Thursday, June 2, 2016

How to write a résumé

Today you're going to create a document that will help get you a job. It doesn't matter whether you call it a résumé or a curriculum vitae (honestly, one's just a little longer than the other). In either case, you're writing the history of your work experience -- your education, your previous jobs and what they taught you, other kinds of experience that have improved your job skills, and the names and addresses of people who can back up your story.

Some general rules:

When it comes to experience, think outside the box. Yes, education and job experience make a difference, but so do activities that don't fall into either category. Did you learn how to explain difficult concepts more than one way, develop critical skills in handling difficult people, and learn the value of patience when you volunteer-tutored kids at a local school? Then it needs to go on your résumé. Did your Scout leader teach you the basics of cooking and kitchen hygiene? You'd better mention that if you're applying for restaurant work. Picked up CPR certification at summer camp? Parents looking for a qualified nanny might appreciate that little tidbit.

Tailor the résumé to the specific job. Back in the dark ages, when people had to type out each and every résumé by hand, it made sense to write one general-purpose document and make copies of it for different companies. These days, though, word processing software makes it simple to keep your résumé fluid and tailor the details to each job for which you apply. Taking the time to do this could land you an interview, so do eet.

DON'T LIE. Some people, concerned about their lack of impressive experience, try to make themselves look better by padding their résumés with less-than-accurate information about their previous jobs. But if your prospective employer discovers your job history is more fantasy than reality, what's the first thing she's learned about you? That you're a facile liar who thinks your potential boss is either too lazy or too stupid to fact-check your résumé? That's not going to win you many brownie points -- and it's sure not going to get you any kind of job requiring a high level of personal integrity. DO NOT MAKE UP STUFF ABOUT YOUR PREVIOUS JOBS. The end.

Here's the information that must be present:
  • Contact information: your name, address, phone number and email, preferably at the top of the résumé. If you don't already have a specific email for work-related purposes, get one (you can pick it up for free through Gmail or another free email service). Don't underestimate the value of a professional-looking email address; potential employers might have second thoughts about hiring you when they see your address is i_smell_like_an_old_burrito@example.com.
  • Educational info: this includes any school you're currently attending, your estimated graduation date, any schools you've attended in the past (especially if you graduated), any certification or training programs you've passed, etc. You don't need to include your cumulative GPA, unless it's stunningly positive and your work experience is a little thin.
  • Work experience: Start with your most recent job title, the company you worked for and the approximate dates you worked there, the job description and the pertinent skills you learned, and work your way through your job history in reverse chronological order. Be prepared to explain any significant gaps between jobs.
  • Other experience: This section is especially helpful to prove that you have marketable skills if, again, your work experience is lacking or has some gaps. Here you should include things like volunteer work, charitable projects, any hobbies and interests that are relevant to the job, or time spent studying abroad (especially if you became fluent in another language or culture while doing so).
  • References: if you list references on your résumé, make sure they are from people who know you professionally and can vouch for your character and work ethic as an employee. Contact them in advance and get their permission to use them as references, and make sure you've listed their most recent contact information (a phone number or email address are probably sufficient). If you want to add a relative or close friend of the family to your references, please limit it to a single person (because nothing says "slacker" like using Mom or Dad as a reference). And this may seem obvious, but it's still worth stating: if you aren't sure someone will give you a positive reference, don't use that person! Better to have no reference at all than a bad one.
There are a number of ways to format your résumé; try Googling "how to format a résumé" if you want some ideas. Personally, I'm in favor of substance over style. Using a single easy-to-read font throughout the document is better than tossing in a half-dozen novelty fonts that make you look like you got hold of way too much caffeine. Simple left-justified text is better than centering everything or inexplicably pulling it to the right margin. And if you want to separate the sections of your résumé, do it with the judicious use of bold and italic text, or create section headers by bumping up the font size a point or two. Also, print on simple high-quality white paper; don't mess around with funky colors or textures. You want the finished document to be simple enough that you could send it as a text-only email without taking 45 minutes to reformat it. Let your experience speak for itself.

Now, go forth and kick some butt (in a competent and professional manner, of course)!

Thursday, December 3, 2015

Basic cooking skills, part 3: Quick breads

[Basic Cooking Skills parts 1 and 2 are here and here, respectively.]

Few things make you look more competent in the kitchen than the ability to bake bread, and few breads are easier to make than quick breads -- that is, breads leavened with agents other than traditional yeast. (Honestly, yeast bread isn't as difficult to make as you might think, but it does take some time -- so if you're looking for close-to-instant gratification, quick breads are the way to go.)

A general note on baking: You can fiddle-fart around with most types of recipes, eyeballing measurements or altering ingredients, and usually you'll still create an edible result. Baking, however, is a subtler kind of alchemy. If you want your baked goods to come out looking and tasting right, you should follow the recipe closely, measure accurately, and bake at the proper temperature and for the right amount of time. Otherwise you run the risk of baking up a batch of hockey pucks, and nobody wants that (except possibly the Vancouver Canucks).

You will need some or all of the following:
  1. a source of clean potable water.
  2. a cookie sheet.
  3. a clean table or kitchen counter.
  4. a mixing bowl.
  5. a set of measuring spoons.
  6. a set of measuring cups.
  7. a knife or other cutting tool.
  8. a whisk or fork.
  9. a biscuit cutter or drinking glass. 
  10. a nonstick griddle or heavy-bottomed pan.
  11. a loaf pan.
  12. an 8" square glass baking dish.
  13. a spatula for cooking.
  14. an oven thermometer.
  15. a kitchen timer.
  16. a stove/oven combination.
  17. an oven glove or hotpad.
  18. a serving bowl.
  19. wax paper and aluminum foil.

Before you begin

A friend of mine used to be solidly convinced that she couldn't bake -- until she moved to a new house. Suddenly all her baked goods started coming out perfectly! The difference: she moved from an apartment with a temperamental, crappy old oven to a house with an oven that actually came up to the right temperature.

Oven temperatures vary a lot, and remember what I just wrote about baking at the proper temperature? Right, so you're going to want an oven thermometer to see what your oven is really doing. Get one of the dial-face thermometers, since it's more reliable. Start with a cold oven, put the oven rack into the middle position and stick your oven thermometer right in the center (or let it hang from the center, if it's a hanging type). Close the door, set your oven to the temperature suggested by your recipe, and let it heat for about 20 minutes (some ovens will beep to let you know they've come up to full heat). Quickly open the door and check the thermometer reading against the temperature. Does your oven run hot? Adjust the temperature down, wait a bit, and check again. Too cold? Bump the temps up a few notches. Trust your thermometer; it will tell you what's really going on in there. Our current oven runs on the cool side, so until we can convince the landlord to get it recalibrated, we have a cheat sheet posted next to the oven that reminds us how many degrees we need to turn it up to get the right temps for baking.

Biscuits

American-style biscuits are little baked quick-breadlets that are closely related to scones. The keys to making light, flaky biscuits are to do most of the mixing before you add the liquid, and not to maul the dough around too much after that -- messing around too much with biscuit dough makes your biscuits tough and hard. Since this is the first actual recipe I've posted, I'm going to go into what might seem like exhaustive detail about ingredients and measuring and blending and so forth. Don't be intimidated. You can do this.

Ingredients:
  • 2 cups all-purpose flour, plus a little more for kneading the dough
  • 3 teaspoons baking powder
  • 1 teaspoon salt
  • ½ cup shortening
  • ¾ cup milk
[About the ingredients: All-purpose flour is the kind you can buy in paper (or, more rarely, fabric) sacks at nearly every supermarket; keep it in a cool dry place when you're not using it. Baking powder is NOT the same thing as baking soda; it usually comes in a cylindrical container, and examples of North American brands include Rumford, Calumet and Clabber Girl. Salt is your basic table salt. Shortening can be either a hydrogenated vegetable oil such as Crisco or a naturally solid shortening such as lard (and don't be scared of lard; it's probably better for you than Crisco). Milk is usually fresh cow's milk, although in this particular recipe you can substitute a non-dairy milk such as almond milk and it'll turn out fine.]

Wash your hands. Preheat your oven to 450 degrees Fahrenheit. (Check it with the oven thermometer to make sure it's accurate.) While it's heating up, you can do the following:

Grab your mixing bowl, a one-cup measuring cup and a level kitchen knife. Dip the cup into the flour until it's overfull, then use the flat section of the kitchen knife to scrape the excess off the top. You want a nice, level cup of flour. Pour this level cup into the mixing bowl, then repeat the process for the second cup. Don't put the flour away just yet; you're going to need it. Now grab your measuring spoons and the baking powder. You're going to use the one teaspoon measure. One by one, scoop up and level off three teaspoons of baking powder, adding them to the mixing bowl. Put the baking powder away. Get the salt, and scoop up/level off a teaspoon of salt, then add it to the bowl. Put the salt away. Now mix together all the dry ingredients in the bowl (you can use a spoon or your hand or even your elbow) until they're well combined.

To make this next step a little easier, you can take the half-cup measuring cup and run it under hot water until the cup starts to feel warm, but it isn't necessary. Pack the shortening into the half-cup measure until it's full, then scrape it out into the bowl. Put the shortening away. Use the knife (two knives are better, and a pastry blender is even better if you happen to have one) to cut the shortening into tiny pieces, gently combining it with the dry ingredients until the mixture looks like fine breadcrumbs.

Clean out the half-cup measuring cup and grab the quarter-cup measuring cup. Get the milk, carefully pour it into the half-cup measure until it's full, and dump the half-cup of milk into the mixing bowl. Now carefully pour milk into the quarter-cup measure until it's full, and dump that in the bowl too. Put the milk away. Gently stir in the milk, just until the dough comes away from the sides of the bowl.

Now for some fun. On a clean, flat, washable surface like a counter or table, sprinkle out a handful of flour. Grab the soft dough out of the bowl and lay it out on the floured surface. Put a little flour on your hands so the dough doesn't stick, and knead the dough 10 times (fold the dough over on itself and flatten it down with the heels of your hands). Remember, DON'T KEEP MAULING IT AROUND.

Gently pat out the biscuit dough with your fingers until it's about 1/2 inch thick. Grab your biscuit cutter or drinking glass, dip it into the flour so the dough won't stick to it, shake off the excess and start cutting out biscuits from the dough (pro tip: cut the biscuits as close together as you possibly can and you won't have to re-roll the dough). Get out your cookie sheet and place the cut biscuits on it, giving them a little room to expand as they bake.

Check the oven thermometer. If the temperature looks right, use your oven glove or hotpad to remove the thermometer. Slide the cookie sheet with the biscuits on it into the oven and bake for 10 to 12 minutes, or until the biscuits just start to get golden brown (set your timer for 10 minutes and check to see what they're doing after that). Once they look about right, use the oven glove to remove the cookie sheet full of golden-brown biscuits and set it on a heatproof surface. Open one biscuit (carefully; it's hot) and taste it to see if the batch is cooked through; if it looks and tastes good, use your hotpad to remove the biscuits from the cookie sheet to a serving bowl. Serve immediately with butter, jam or honey. (Now put the flour away, and wash up after yourself.)

You can easily fancy these up by adding goodies to the biscuit dough (savory biscuit variations: half a cup of grated cheese, or several tablespoons of finely minced scallions or chives, or small amounts of dried herbs, or a half-teaspoon of curry powder). But the first time you make them, just follow the basic recipe and see what they're like.

Pancakes

Pancakes are almost the ultimate breakfast food (since the coveted first-place spot goes to BACON), quick to cook and delicious. You may think that pancakes are hard to make, or that they take too much time to prepare. Ha! Let me show you how to put a batch of these together on a lazy weekend, then freeze the rest for instant gratification breakfasts on busy mornings.

Ingredients:
  • 1 egg
  • 1 cup milk
  • 2 tablespoons oil, plus a bit more for cooking
  • 1 cup flour
  • 1 tablespoon sugar
  • 1 tablespoon baking powder
  • ½ teaspoon salt
Wash your hands. Crack the egg, open it up, and pour its gooey contents into a mixing bowl. Throw the shell away. (If you accidentally got any bits of shell in the bowl, fish them out and throw them away.) Use a whisk or fork to scramble up the egg until the yellow and clear stuff are thoroughly mixed together. Add the milk and oil and whisk again, then add the dry ingredients (measure them the same as in the other recipe -- dip, level, pour) and mix the batter until it's just blended together (pancake batter doesn't need to be super smooth).

Set your stove burner to medium to medium-high heat; after you've done a few pancake batches you'll figure out which is the perfect heat to cook the pancakes just right. Put the griddle or pan on the stove and let it heat up for a minute (you can check it with the water test to see if it's hot enough). Once it's hot, add a small amount of oil to the griddle and gently swirl it around to cover the bottom.

The first pancake is a test run to see if the griddle is at the right temperature, so let it cook all by itself. Scoop up about 1/3 cup of batter (you can use a measuring cup if you want to be precise) and pour it onto the hot griddle. The batter should spread out a bit. Keep an eye on the pancake, but don't poke at it or otherwise mess around with it. You'll know it's time to flip the pancake when two things happen: 1) the edges of the pancake start to look "dry" compared to the rest of the batter, and 2) bubbles start to pop and form holes on the top of the pancake. Grab your spatula, slide it under your pancake and gently flip it over. What you're hoping to see is a nice golden brown color on the flipped pancake. Even if it's a little darker brown than golden, it's still fine to eat, though you may want to adjust the temperature down for additional pancakes.

You don't need to keep the flipped pancake on the griddle very long -- just enough to brown the bottom (you can lift the pancake with the spatula to check). Don't let the pancake get cold -- once it's done, slide the spatula under that pancake, move it to a serving plate, drizzle it with your topping of choice and SCARF IT DOWN! (Oh, and take the griddle off the heat if you aren't going to make more pancakes immediately.)

Ideas for toppings: melted butter or coconut oil, honey, maple syrup, agave syrup, chocolate syrup, peanut butter, fresh fruit, fruit jam (lingonberry jam is particularly fantastic), or you can go the savory route and make yourself a pancake sandwich with sliced ham and cheese.

This particular recipe makes about 10 standard-sized pancakes, but most of us can't eat that many in one go. So after making a few pancakes on a lazy morning, you may get full fast and be tempted to tip the rest of the pancake batter down the sink. DO NOT DO THIS. If you have a freezer, some wax paper and some aluminum foil, you can make Instant Gratification Pancakes. How's this work? I'mma tell ya how!

When you're all fulla pancake-y goodness, don't put the griddle away just yet. Keep cooking pancakes until you're out of batter. Set the finished pancakes on a clean plate, but don't put any toppings on them and don't stack them on top of each other. You want these pancakes to cool down, and they'll cool faster if they're separated.

Once the pancakes are cool enough to handle, tear off a section of wax paper big enough to cover a pancake, and put it on the top of the first pancake. Stack a second pancake on top of this one and top it with another sheet of wax paper. Continue until all the pancakes are stacked and separated by sheets of wax paper. Then tear off enough aluminum foil to wrap them all together (tightly, but not compressed) and make a foil-covered tower of pancakes. Stick that thing in the freezer. Because the pancakes are separated by wax paper, they won't stick to each other as they freeze. Pancakes frozen like this will stay high quality for 2 months.

Now on busy mornings when you want pancakes for breakfast, just find the foil tower you created, peel it open and pull out a pancake or two, tossing the wax paper as you do. (Wrap up what you aren't going to use and stick it back in the freezer for another day.) You can toast your frozen pancakes like bread, or nuke them for a minute or two in a microwave. Ta-daa, hot pancakes!

Cornbread

I promised I'd teach you to make cornbread, didn't I? Well, here we go. Possibly the best thing to accompany a bean dish -- not only do they taste good together, but beans and cornbread constitute a complete protein.

Ingredients:
  • 1 cup milk
  • ¼ cup butter, melted
  • 1 egg
  • 1¼ cups cornmeal
  • 1 cup flour
  • ½ cup sugar
  • 1 tablespoon baking powder
  • ½ teaspoon salt
  • a little shortening for greasing the dish
Wash your hands. Make sure the oven rack is in the center of the oven, then preheat the oven to 400 degrees Fahrenheit. Grab your 8" square glass baking dish and grease it with shortening (one easy way to do this is to cover your hand with a plastic sandwich bag and wipe the shortening around the sides and bottom of the dish; when you're done, toss the sandwich bag).

In a large mixing bowl, crack and whisk up an egg, then add milk and butter and beat them together. Stir in all the remaining ingredients at once, and mix just until the flour is moist (the batter will be lumpy, but that's OK). Pour the batter into the prepared dish and slide it into the preheated oven.

Bake the cornbread 20 to 25 minutes, or until a toothpick inserted into the center of the bread comes out clean. Cut into squares and eat with gusto and many happy noises. Also eat with beans.

Pumpkin Bread

In the autumn, pumpkins and other squashes are cheap. But in North America, you can buy canned pumpkin purée pretty much any time of the year, and this is one of the best ways to use it. So go get your pumpkin on!

Ingredients:
  • 1½ cups sugar (or half sugar and half molasses)
  • ¼ teaspoon baking powder
  • 1 teaspoon baking soda
  • 1⅔ cups flour
  • ¾ teaspoon salt
  • ½ teaspoon each cinnamon, nutmeg and cloves (or use 1½ teaspoons pumpkin pie spice)
  • 2 eggs
  • ½ cup oil
  • 1 cup pumpkin purée
  • a little shortening for greasing the pan
Wash your hands. Make sure the oven rack is in the center of the oven, then preheat the oven to 350 degrees Fahrenheit. In a mixing bowl, mix together dry ingredients (and/or molasses, if you're using it). In another bowl, crack and scramble the eggs, mix them together with the oil and pumpkin purée, then add the wet ingredients to the dry stuff in the first bowl and stir to combine well.

Grease your loaf pan with shortening and dust it with flour (put a little flour into the bottom of the pan, roll it around the sides and bottom until all the shortening is coated with flour, and toss the excess), so the loaf doesn't stick to the pan. Pour the batter into the loaf pan, making sure the batter extends all the way to the corners, and slide the pan into the preheated oven.

Bake the loaf 1 hour, or until a toothpick inserted into the center of the loaf comes out clean. When it's done, remove it from the oven (turn the oven off) and let it cool in the pan about 10 minutes before you gently remove it and let it finish cooling. OK, if you can't resist sawing off a still-warm hunk of pumpkin bread and inhaling it with butter, I won't tell anyone.

There are lots of other quick breads to try out, but these should get you started. And especially if you get good at making pumpkin bread, you are on your way to being able to bake goodies for Christmas, which means people will LOVE you. Enjoy!

Saturday, December 27, 2014

Frugality vs. cheapskatery

What does it mean to be frugal? What does it mean to be a cheapskate? Are the meanings of these two words roughly synonymous, or are they vastly different? (And why am I asking myself rhetorical questions again?)

After a little while pondering the ponderous, I think I've come to a fairly concise (well, as concise as I ever get) definition of the two:

Frugality is being careful with your own money.
Cheapskatery is being wasteful with other people's money.

Let's break this down a little further.

When you are frugal, you take the time to be mindful of the way you use the money that comes into your life. It doesn't mean you never spend money; rather, it means you consider what's important to you, and put most of your money toward those important things. Frugality is a vital part of responsible adult behavior, and teaching people how to be frugal is part of the purpose of this blog. You can take pride in becoming frugal.

You should take no pride, however, in being called a cheapskate. Though cheapskatery may look similar to frugality on the surface, it is markedly different under the skin. When you seek to be frugal, you're trying to make the most of your money so that your spending comes in line with your personal values. Cheapskates, on the other hand, try to save their money at any and all costs. Often they seek to save their own money by forcing other people to spend theirs instead -- for instance, they may have enough money to buy lunch, but try to get other people to buy it for them so they can save their own cash. BIG HINT, KIDS: this is scummy behavior.

And you'd better not justify your scummy behavior in front of me by saying, "Well, I'm poor and other people can afford it more," or some such rich bull feces, or I'll kick your cheap little butt. Because even if you save enough on other people's backs to become rich, you'll have developed a lifelong habit of mooching off other people to get there, and believe me, you'll go right on being a scummy cheapskate even when you have millions in the bank. Do you really want to become a modern-day Hetty Green? (No, no you don't.)

OK, maybe you're still not entirely clear on the concept. Let me provide you with a few Tales of the Cheap and Scummy, and some alternative frugal options.

CHEAPO: One of my dad's college roommates, a notorious cheapskate, wanted to take his girlfriend out on a date. Since my dad had a nice car, Mr. Cheapskate approached him to ask if he could borrow the car for a date night. Dad agreed; his only requirement was that his roommate pay for the gasoline he used. Well, Mr. Cheapskate took his date to a night on the town 45 miles away, and when he returned the car, which was running on fumes, he handed my dad 25 cents as his gas contribution. (Granted, this was at a time when gas cost approximately 40 cents per gallon, but cars also burned a lot more gas than they do now.)

FRUGAL: Figure out the social calculus of this exchange for half a second. You're much more likely to deal with your (annoyed) roomie every day than you are with the girl you're trying to impress for one night, so it makes the most logical sense to stay on good terms with your roommate. If you have enough money to take your girl on a nice date, you have enough money to fill the tank of the car you borrowed. And you should fill the tank, even if the tank wasn't full to start with. It's a way of expressing your thanks for your roommate's thoughtfulness and generosity at loaning you the car at all. If you don't have enough money for both the night out and the gasoline, maybe you should consider a less expensive date, or one you can go on closer to home. Or you should put the date on hold until you have a little more money. Learning to say "no" to things you can't afford or don't want is one of the first skills of frugal living.

CHEAPO: I know of a woman who loves going out to eat. She used to approach all her friends with an idea for lunch or dinner: "Let's get Mexican!" "Let's go get sushi!" "Who wants Indian?" They'd agree and go off to eat together, but when the bill arrived, the woman who suggested the outing in the first place would say sadly, "Oh, but I don't have enough money to cover this." Her friends would cover her share, first empathetically, then begrudgingly. Soon some of them learned not to accept her constant, thinly-veiled invitations to pay for her meals.

FRUGAL: If you can't pay for your own meal, don't instigate a mass lunch or dinner date in the first place. Really want to go out with friends? Then suggest a place you can afford. If you don't want to be stuck paying for someone else's meal, request separate checks before you even sit down. And if you end up going to a restaurant where you look over the prices and determine that you can't pay for the meal, it's perfectly acceptable to bow out. If you get into a situation where someone insists on paying for your meal, then you pay for that person's meal on another occasion. (Don't just promise to pay. DO IT.)

CHEAPO: My grandfather, who was in the ski troops during World War II, had a heavy military ski coat -- one of a very few things he'd kept from his war experiences. A relative asked to borrow that coat in order to go on a skiing trip with his brother, and my grandfather agreed to lend it to him. Months went by, and the coat did not return. Finally my grandfather asked about it. "Well," said the cheapskate relative, "it's not like you can use it any more. I gave it to my brother. He could really use a nice heavy skiing coat like that."

FRUGAL: YOU DO NOT GIVE AWAY OTHER PEOPLE'S POSSESSIONS. EVER. EVER!! I can't possibly emphasize this enough. It doesn't matter if they can't use them any more (my grandfather had lost a leg in the war, which made it difficult for him to ski); it's not up to you to make that decision because IT'S NOT YOURS TO GIVE AWAY. If you borrow possessions from people (books, movies, music, small appliances, tools, anything), take good care of them, keep track of them and return them promptly. Do not give them away, do not loan them out to other people, and FOR THE LUVVA PETE don't force people to come to you to get their stuff back, you cheap jerk.

CHEAPO: A relative of mine called to ask if his in-laws could stay with my mother for one night while they dropped off a son at school. She, assuming it would be the son and his two parents, agreed. But on the evening of the agreed-upon day, a family of eight arrived on my mother's doorstep and proceeded to take over the entire ground floor, including the kitchen. The next morning, the father of the family decided to change his plans (I guess staying in a home for free seemed better than camping to him), and announced to my mother that they would be extending their stay a little longer. "Longer" turned out to be a full eight days. During this time there was no way for my mother or sister to make meals, and the family did not invite their hosts to eat with them. When these cheap locusts finally decamped (to their credit, at least they had the common decency to clean up after themselves), they left my mother with a housewarming gift that cost approximately 75 cents. The relative who had originally called in the favor, who had no idea what his in-laws were doing, was mortified at their behavior.

FRUGAL: Sharing one's home is one of the most generous things anyone can do. If someone is hospitable enough to put you up in his or her home, stay only the agreed-upon time and no longer. You don't have the right to renegotiate terms once you're within the walls. You don't have the right to take over and monopolize household resources such as the kitchen. You don't have the right to invite additional people to stay with you. And at bare minimum, send your host a thank-you note after your stay. Again, if you can't afford to pay for an extended stay for the whole family and they don't need to be there, maybe you should leave some of them at home. And yes, if you plan on staying that long with that many people, camping is a much more frugal choice.

I think I've made my point: it's perfectly acceptable to be frugal, but the whole world hates a cheapskate. Don't be that guy. Be careful with your money, but don't save your resources by forcing other people to spend theirs, or you deserve to have your cheap butt kicked from here to China.

Wednesday, October 2, 2013

How to talk on the telephone

One of the many ironies of first-world life: as more and more people carry mobile phones with them at all times, fewer and fewer of them seem to have been taught the basics of how to use them properly. They do not grasp, let alone practice, even the most basic telephone etiquette. The other day I took a call from a young man (I'd guess he was in his late teens or early twenties) who, unless he was raised in a cave somewhere, had probably been using phones most of his life. He failed to give his name or the name of the organization he represented, "umm"ed and "uh"ed his way through most of the conversation, and I had to use my phenomenal psychic powers to determine the point of his call, since he failed to articulate it. Yes, I realize a growing number of people have telephobia and try to avoid making or taking phone calls at any cost, but face it: you can't go through life cowering like a frightened fluffy bunny behind a wall of text.

So: time to tackle the art of the phone call.

You will need:
  1. A working telephone.
  2. The ability to speak and listen.
  3. The phone number of a person you want to call, or an incoming call to deal with.
  4. A pen or pencil and piece of paper (optional, but very useful).
Some general rules for both outgoing and incoming calls:

Practice your phone speech. A good telephone conversation has a few things in common with good public speaking: have something specific to say, maintain appropriate volume, articulate your words properly, and keep a medium pace. Especially if you're nervous, you should practice what you plan to say -- not too loud, not too soft, well enunciated -- and try to slow down, since most people tend to chatter like a caffeinated squirrel when they're scared.

Don't assume you know who's on the other end. Caller ID is a false friend. You can't assume it's your brother on the line just because you see his name and number pop up on the screen; it could be anybody from your sister-in-law to your three-year-old nephew to some raving psycho who found your brother's phone on the bus. Likewise, don't assume you recognize a familiar voice and start blathering away about the latest chapter in your epic battle with irritable bowel syndrome; many people have similar phone voices. (I can't tell you how many times I've been mistaken for my mother or sisters on the phone. Sometimes I have utilized this confusion for my own Nefarious Purposes, so be warned.)

Don't say anything aloud you don't want people to hear. Period. If anything, the Mute button is even more treacherous than Caller ID. You can't trust it to keep your nose clean. It's better to assume, from the moment you pick up the phone to the moment you end the call, that everything you say will be live and audible. This extends to personal and background noises, too, so don't conduct phone calls in a steel foundry or construction area, don't have conversations of a private nature while in a public place, and for the love of all that's holy, don't talk on the phone while you're trying to eat or poop. Just... no.

If you're on a cell phone, don't talk and drive at once. It's become illegal in many states to talk while driving, as most people can't timeslice their focus enough to do both these things well simultaneously. If you must take a call while in the car, at least pull over to do it. And if it's legal to talk while driving in your state, use a hands-free phone, won't you?

Making a call


Determine a clear objective. You probably have a few friends whom you can call up and just ramble about any old thing that comes into your head. For everyone else, have a specific reason to call -- it's polite not to take up too much of their time with chitchat. If you're nervous or forgetful, write down the reason why you're calling on a piece of paper so you can remember to get to the point.

Dial carefully. This is pretty self-evident -- as amusing as some wrong numbers can be, I assume you actually want to talk to a specific person.

Give your own name and refer to the person you want to speak to by first and last name, if you know it. When someone answers the phone, you should say, "Hello, this is [Joe Doakes, or whatever your name happens to be]. May I speak to [Jane Doe... or whoever], please?" This covers a few bases at once: it lets the caller know who you are, it tells the caller who you want to speak to, and it clears up any misconceptions about whether or not you called the right number. (Why first AND last name, if possible? Because it specifically identifies the person you intended to call. If you just ask to speak to "Ms. Jernigan" and there are five women at that number with that last name, you could end up talking to any one of them, or all five in turn. It's like Russian roulette!)

Once you have the right person on the line, give your name again and start pleasantly. Eventually someone will come to the phone. At that point you should say, "[Jane/Mrs. Doe/whoever]?" and check for verification like "yes?". Then you identify yourself again: "This is [Joe Doakes/your name here]," and if you're calling on behalf of a company or organization, you add, "calling for [What On Earth Productions/Disney Studios/Industrial Light and Magic/whatev]." If you think this person might have trouble placing you, give a memory-jogger: "We met the other day in an Underwater Basketweaving seminar" or "I'm the guy who keeps falling asleep in Chemistry class and setting his T-shirt on fire."  Then add a polite pleasantry: "How are you?" is the industry standard. Listen and reply to the response appropriately. Most people will say, "Fine," but if the response is anything less than positive, it's appropriate to express sympathy: "Oh, I'm sorry to hear that."

Get to the objective. After identifying who you are and being pleasant, you should get right to the reason why you called. For example, if you're talking to your ophthalmologist's secretary: "I'm calling to make an eye appointment for Tuesday, if possible. What times are available?" Or, if you're asking someone on a date: "I'm calling because Arsenic and Old Lace is playing at the Capitol this weekend and I was wondering if you'd like to go see it with me." (Hint: it's probably not appropriate to ask someone out on a date right then if the answer to "How are you?" is gushing sobs, followed by "My cat just got run over." Timing is everything.) Continue with the details of the objective, writing down appointment days and dates, determining when and where you'll meet for an evening out, etc.

Bring it to a graceful end. Once you've achieved the objective of your call, it's best to bring the conversation to a gentle close. You should reiterate the information you've received, thank the person and give some word of farewell. Example: "So I'm seeing Dr. Smith this Tuesday at 4 p.m., is that correct?" [Yes.] "All right, thank you very much for your help. Goodbye." Or, in the case of the date: "All right, so I'm picking you up at 6:30 on Saturday. Great, thanks! I'll see you then. Bye."

Hang up. Congratulations, you did it!

Taking a call


Find out (politely) who is on the line. Sometimes you'll know right away who's calling you because that person practices good phone etiquette, but in case he or she doesn't read this blog, you may need to ask. Blurting out "Who is this?" will get you the information you want, but it's about as delicate as cutting paper with a chainsaw. "May I ask who's calling, please?" is more genteel. (If it's someone whose voice you should have known, you can always say, legitimately, that you didn't recognize his voice on the phone. As mentioned, many people have similar phone voices.)

Pay attention to the flow of conversation. OK, I'll 'fess up... sometimes, when a conversation wanders far and wide, so does my brain. This is widely considered rude behavior, but there are a few things you can do to avoid it. For one thing, if you know you're not a good multitasker on the phone, try not to distract yourself with activities that require the language-processing part of your noggin -- you won't be able to keep track of what's being said and you'll end up giving some random, inappropriate response because you weren't really listening. If you aren't doing something that requires your vision, you can sometimes concentrate better on the conversation with your eyes closed. And if you're Super ADD Chick and this conversation is really vital, grab that pen and piece of paper and take notes as you go.

If things are getting long, (gently) steer the caller toward a close. We all know somebody -- it might be a relative, it might be a friend, it might even be a stranger with a wrong number -- who is constitutionally incapable of conducting a phone call for less than 20 minutes. In such a situation, particularly if you're pressed for time, you may steer the caller toward the exit, such as: "Well, Aunt Vickie, it's been lovely to hear a blow-by-blow of your surgery, but I'm afraid it's time for me to go." This farewell accomplishes two things: it usually brings the Neverending Story to a close, and it sometimes manages to pop free from the recesses of the caller's head the reason why he/she called you in the first place.

(NOTE: Etiquette dictates that if you are stuck in an interminable conversation, you are NOT allowed to lie about going through a tunnel, running out of juice on your cell phone, or otherwise faking up an excuse to hang up on the caller. However, if you really do have bad enough reception that you lose the call, you are allowed the right not to call back. So if you can't end a call and you're contemplating gnawing off your own leg to escape, just set your phone to hands-free mode, get in your car and drive toward the nearest tunnel...)

If you're nervous about phone conversations, remember: like everything else, they become easier the more often you practice. Ask people you know and trust to field your first few calls and give you pointers about how well you did. Come on, you can do this! I have faith in you! And so would Alexander Graham Bell, or he wouldn't have invented this chatty contraption in the first place.

Tuesday, July 16, 2013

How to set a table

It's coming. And like most such eventualities, it's likely to hit you when you least expect.

Maybe you'll be at a summer barbecue... maybe at a potluck... or maybe just at a friend's house for an informal dinner. Someone will hand you a stack of plates and say, "Set the table, please, won't you?"

AND YOU WILL PANIC, FLING PLATES IN ALL DIRECTIONS AND RUN FOR YOUR LIFE.

Because, of course, you won't know what you're doing. While hurling plates will certainly create an unforgettable diversion, your hostess may be a wee bit annoyed if you treat her grandmother's fine china like clay pigeons. So you might as well learn ahead of time how to set the table properly.

You will need (at minimum):
  1. A table big enough to seat everyone in attendance (or satellite tables, if necessary).
  2. A chair for each person.
  3. A plate for each person.
  4. Flatware (aka silverware) for each person.
  5. A drinking glass for each person.
  6. A napkin for each person.
When it comes to place settings, the formal etiquette books tend to show the full monty, with fish forks and crab crackers and asparagus tongs and nut forceps and multiple beverage glasses. But don't sweat it; everyday place settings are much simpler. You only use the pieces you'll need to eat the meal (e.g. if your hostess isn't serving soup, you don't need to put down a soup spoon).

Put the plates down first, so that every place at the table has a plate. Ideally you want to space the plates out enough so that people don't constantly elbow each other during the meal, but sometimes space is tight, especially in large gatherings or big families. Just do your best. Then build the rest of the place setting around the plate. If you're not sure what flatware or beverage glasses you'll need for the meal, ask your hostess.

Here's one of the most basic of place settings for a meal that uses a fork, knife and spoon. In the middle is the dinner plate (about 7 inches in diameter). To the left of the plate is the fork, atop a rectangular folded napkin. To the right of the plate is the dinner knife, always with the cutting edge facing toward the plate, and to the right of that is the teaspoon. (In nearly all cases you won't need the larger "tablespoon," aka the soup spoon.) Above and to the right of the plate, between the plate and the knife, is the beverage glass. (This particular setting is for an alcohol-free meal, but if you were having wine with dinner, the wine glass would go just to the right of the beverage glass.) If you're feeling OCD, you should note that the flatware properly lines up along the bottoms of the handles.

There are a couple of standard variations on this theme -- for instance, you can place the folded napkin across the plate instead of beneath the fork -- but for most everyday situations this should have you covered.

See? Not so tough. If you're scared you'll forget, you can print out the masterfully sketched place setting above and keep it in your wallet as a "cheat sheet" until you have it down. It's a lot less embarrassing than having to come up with an apology for breaking all the Spode.

Friday, June 28, 2013

What not to say

Human beings are a social species who usually learn best from observation and mimicry. As they watch others interact, most children and young adults begin to pick up certain social cues, discovering that human beings are sensitive and easily irked about specific subjects; they realize that when it comes to such subjects, even if they're curious, it's best to be circumspect and thoughtful of another person's feelings.

And then there are those poor souls who just can't take the hint. They blurt out embarrassing questions, make obnoxious comments, and otherwise induce cringing and bristling with their thoughtlessness wherever they go. Nothing seems to get through to their brains short of being hit with a clue-by-four. I guess some of these people become paparazzi, making a precarious living by routinely pelting strangers with the kinds of questions most of us would never presume to ask. But most of these unfortunates go through life vaguely wondering why so many people seem to shun them.

If you're one of these people, you probably don't know it, so even if you don't think this list applies to you, read it anyway. You might learn something.

Questions you should not ask


Do not blurt out any of the following questions, no matter how much you think you want the answer:
  • "Why aren't you married yet?"
  • "Why don't you have any kids? / Don't you want any kids?"
  • "You have so many children -- don't you believe in birth control?"
  • "What are you going to do now that your husband's in jail?"
  • "Why'd you lose your job?"
  • "Why did your wife leave you for another woman?"
  • "Is your kid retarded or something?"
  • "Is that your real hair?"
  • "So, how's your sex life?"
  • "Did you really get a case of chlamydia in college?"
  • "Don't you know you need to lose some weight?"
You may think you can discuss such potentially painful topics with tact and sensitivity, but you are wrong. The kinds of people who think it is OK to ask such questions, generally speaking, have no tact or sensitivity, so it's best if you keep quiet. If the object of your curiosity wants you to know the answers to such potentially sensitive questions, he or she will bring them up voluntarily. Otherwise, it's really none of your business.

These aren't the only blunt, rude questions in existence; an exhaustive list of such questions would take up too much time and space here to be practical. So, what's the rule of thumb for this situation? It requires a little bit of thought, and it forces you to try to think like another person -- which is sometimes a difficult exercise for the clueless. You must ask yourself: is this question I want to ask likely to make this other person uncomfortable or put him/her on the spot? If you even think the answer might be yes, don't ask the question. Done.

Comments you should not make


Our society is chockablock with people who think it's perfectly acceptable to make rude, unsolicited comments about other people's appearance, from construction workers who wolf-whistle at passing women to catty gossip columnists who can't wait to rip into someone's Oscar night ensemble. But this social tendency is based on a grave and widespread misunderstanding of bodily ownership. You do not need to make unsolicited negative comments about another person's appearance, even if you are a close friend or family member of that person.

For instance, at the time of this writing my brother Timothy has long, curly hippie hair. He grew his hair out deliberately, and he likes it that way. Everyone in his family has at one time or another voiced an opinion (mostly negative) about his hair's current appearance, but it's his hair and he has the right to wear it as he likes. Yes, people have pointed out the potential employment and social consequences that go along with the decision to sport an unorthodox look, but Timothy is willing to live with those consequences, and he's smart enough to find ways to overcome them.

If this rule applies to one's chosen appearance, it goes double for aspects of one's appearance over which one has very little control. So, morbidly obese people of average intelligence already know they are overweight, and they do not need you or anyone else to point out the obvious to them, since they must deal with the physical and social consequences of their excess weight every day. Likewise, not every skinny girl has anorexia, balding men do not need Rogaine, teenagers probably dislike their acne even more than you do, and naturally large-breasted women did not deliberately inflate their chests just to arouse your lust and/or envy. There's no need for you to jump in and shame these people because their looks somehow do not jibe with your own standards for personal appearance. Now, if a friend actively solicits your opinion -- if, for instance, he asks you whether he looks all right -- you may certainly say what you think. But in all other circumstances, you are meant to remember that people look different from one another, and that their bodies are not your property or your responsibility. Deal with it.

Promises you cannot keep


Some people have a particular problem with making promises they can't keep, or as the old idiom puts it, "your mouth's writing checks that your body can't cash." This problem manifests in many forms: when you make a promise to be somewhere and forget to show up -- all the time; when you pose overwrought threats you don't intend to make good on (some parents pull this little stunt -- "If you don't turn off that game now, I am grounding you for the rest of your life!"); or when you dangle an imaginary carrot in front of someone without actually having the means or the desire to provide it (i.e. "Clean up your room and we'll go to Disneyland tomorrow!" when you live in Ohio and don't make enough money to catch a flight to Pittsburgh, let alone Orange County).

Making a promise you can't keep, especially if you do it often, is colloquially called LYING. People don't really like or trust you if you lie to them all the time. They learn to ignore your empty threats as well as your meaningless promises. The only way to regain the trust of people who are tired of your lies is to practice making and keeping your promises to them. This takes time, it's hard, and it requires you to stop and think before you allow another meaningless lie to tumble out of your mouth. But as people see you working to change your behavior, they will slowly, cautiously, begin to trust you again with small issues.

If, like me, you have difficulty remembering the promises you make, carry a notebook and pen and write them down. Hold yourself accountable to your own words. And if you find yourself making a promise you can't keep, apologize and restate: "Count me in... wait, this Friday? Oh, I'm sorry, I can't be there. I already have an obligation." It makes a difference when people can see from your actions that you value their time and keep the promises you make. They might actually begin to treat you like -- oh, I don't know -- an adult.

Thursday, June 27, 2013

How to get a driver's license in the United States

So you want the freedom that comes with wheels! The allure of the open road! Endless cruising in a red Ferarri convertible with the wind slicking back your hair, if you have any!

Not so fast, Sparky. You need a driver's license first. (Not to mention a car.) Here's how to get licensed.

Rules for obtaining a driver's license vary from state to state. For a great roundup of information, visit DMV.org.  But in every state you'll need to do a few things before you get your license: get insured, learn how to drive, pass a written (knowledge) test, pass a road test, and pay a license fee.

Get insured

If you're just getting a driver's license as a form of ID, you don't need to buy insurance. Otherwise, it's time to get legal. Nearly every state in the Union has a compulsory driver insurance law on the books, requiring drivers to carry at least basic collision insurance in case they get into an accident. Because new drivers are much more likely to get in a fender-bender, you'll probably pay higher costs for this insurance than a more mature driver would. Yeah, I know, but at least the price you have to pay decreases over time. Take a look at DMV.org for specific information about car insurance in your state. Also, since insurance rates vary, shop around to find a good combination of reasonable rates and good coverage.

Getting insured is your responsibility as an adult -- not your parents'. Don't go beg them for coverage! Jeez, dude, show some self-respect. If you can't afford car insurance, well, best get used to riding the bus, biking places, and catching the Heel-Toe Express for the foreseeable future.  Driving while uninsured is a really, REALLY stupid idea.

Once you get insured, you must carry proof of insurance in your car at all times. Most insurance companies will send you a small card with basic information about your policy, which you can use as proof that you're insured. Don't keep it in your glove box. If yours is anything like mine, it's stuffed full of random crud, and if a police officer pulls you over, she won't be impressed by you pawing through the glove box for 15 minutes trying to find your proof of insurance card. I put mine in a protective sleeve and clip it to one of the sun visors above the windshield, along with the vehicle registration, so it's easy to find.

Learn to drive

Again, state requirements to pass this milestone vary. Some states offer a drivers' education class in public high school, others require you to pay for and attend a state-approved driving school, and still others will allow you to learn to drive from any licensed driver. Almost every state requires you to get a certain number of hours of driving practice -- some of which have to be at night -- before they will issue you a license. Go to DMV.org and look up the specific information for your state.

If you're under 21, you will usually need to get a temporary learner's permit to practice driving legally on public roads before you get a full license. Check with DMV.org for all the details.

Pass a knowledge test

The knowledge test (sometimes called a "written test") checks to see if you understand driving laws. Every state has its own driver handbook explaining the rules of the road. You need to read it and review it thoroughly. (All of it, Frank. Don't ever intend to drink and drive? Well, good, but you still have to learn about things like the legal blood alcohol intoxication limit in your state. They WILL test you on all of this stuff, even if you don't think it applies to you.)

Older knowledge tests are pen-and-paper, but almost nobody uses them any more. Far more common are computerized tests. You can't take them online, though -- you have to go to your state's motor vehicles department or another authorized testing center to take a knowledge test. Here, again, DMV.org is your friend. It provides links to local information on taking practice tests, and where and when you can take a knowledge test for full credit. You have to get a certain percentage of questions right (in most cases it's 80% or above) to pass the test, so if you're not sure about an answer and the test gives you an option to skip over it, do so.

Pass the road test

This can be the hardest part of getting your license, even if you're a good driver. Something about being in a car along with someone who has the awesome power to give or withhold your license can make you nervous enough to run red lights and mangle a parallel parking job. (Trust me; this is coming from someone who failed her road test thrice.) Here my only advice is to focus, concentrate, buckle up, and keep any music and your cell phone turned off -- distraction usually equals failure.

Pay the license fee

Yeah, it bites, but licenses are yet another thing you have to pay for. DMV.org will help you know ahead of time how much your license will cost, the payment methods your local motor vehicles department accepts, and any other paperwork they'll need from you so you can bring it along when you come in. Unless you plan on operating heavy machinery or riding a motorcycle, a basic license should be all you need (names and class categories for a basic license vary a lot, so find out what your state info says).

The Motor Voter Act allows you to register to vote at the same time you get your driver's license. If you're eligible to vote and you haven't already done so, this is a great way to kill two birds with one stone.

Be prepared to have your picture taken for the license. Most states require you to show your full face, looking straight into the camera. You may be asked to remove glasses, veils, or any other accessory that obscures your full face. Oh, and be prepared to hate this picture with a white-hot passion -- photos taken for driver's licenses and passports are notoriously ugly.

Some states will issue you a full driver's license right then and there. Others may issue you a temporary license, with your permanent one arriving in the mail a few weeks later. Either way, you're now street legal!

Looking to pick up a red Ferrari convertible? Sorry, you're on your own.

Friday, June 21, 2013

How to care for yourself when you're ill

I don't care if you think you're Strong Like Bool -- sooner or later in life, you're going to come down with a case of the ick. Everyone does. When that day comes, don't be the person who has to call Mom or your significant other or whoever-it-is to come wait on you hand and foot because you have no clue how to take care of yourself. Unless you're seriously incapacitated -- as in hooked up to an IV drip in a hospital bed -- you can do most or all of these things on your own.

See a doctor.

Yep, start out with the advice of a specialist. You need to talk to someone with medical expertise who can review your symptoms, make an informed diagnosis and give you further instructions. And don't start in on me with "But I don't have health insurance!" (Situations like this are the reason you want health insurance in the first place, but that's a discussion for another day.) If you don't have a primary care provider, visit a walk-in health clinic. If you're a college student, there's usually a cheap or free clinic on campus. In a pinch -- say, when you have the shakes and a high fever (102 F or above) in the middle of the night -- get to an emergency room. The money you pay to care for yourself is an investment in the rest of your life, and some illnesses don't get better on their own, so don't mess around -- see a professional first.

Get and take any medication the doctor prescribes.

You're not going to need prescription medication for every illness, but on occasions when your doctor writes a prescription, pick it up from the drugstore right away. (If you're so far gone that you can't make it to the drugstore, call in a favor and get a friend to pick it up for you -- using your money, of course.) If you're concerned about what it's going to cost you, ask your doctor if there is a generic version of the medication available -- this usually lowers the cost of a particular drug -- and shop around if you can; prices for prescription drugs vary from store to store.

Most prescription medications now come with a long printed insert explaining how the medicine is used and what to expect from it. At the very least, read and know the serious side effects of any medicine you take; if you notice you're developing any of these side effects, or if anything else alarming happens -- for instance, if flaming snakes are erupting from your walls and ceiling, that's usually a bad sign -- stop taking the medicine and call the doctor who prescribed it right away.

If you don't get any serious side effects, you should keep taking the medicine as your doctor prescribed. Come on, you're not going to get better by magical medical osmosis if you pick up your prescription but don't actually take it. It's especially important to take antibiotics on schedule until they're all gone, not just until you feel better. Bacteria are tough little buggers, and some of them can bounce back and make you even sicker if you don't finish the whole course of antibiotics, so stick to the program.

Just have a cold? Some over-the-counter remedies are your friends. Others, not s'much. The FDA has more useful info.

Follow doctor's orders.

If your doctor recommends that you breathe moist air, get or borrow a humidifier and use it. If your doctor tells you to stay away from spicy food, put down the three-alarm chili. You just paid to get the benefit of six to eight years of medical school knowledge -- so follow your doctor's advice!

Let people know you're sick.

If people are depending on you and you're not going to be there, call or email them and let them know you're lying flat in bed with a case of the crud. As Wilford Brimley would say, "It's the right thing to do!"

Keep it clean.

You probably got sick because you were exposed to somebody with the mung in the first place. The best way to keep from spreading the joy around is to keep yourself and your environment clean. Also, you can combat some kinds of illness by reducing the total bacterial load. Bathe regularly, wash your hands, and if you're Super OCD you can get some of those antibacterial wipes and rub down things like door handles.

SLEEEEEEEP.

The human body is capable of healing itself, given some downtime, so get as much sleep as you can. Or at least get plenty of rest. If you can't just lie in bed without going stir crazy, watch a movie or play a game on your phone or just read a favorite book -- any pastime that doesn't require a lot of strenuous physical or mental activity is fine. If you have bronchitis or some other respiratory crud and find the coughing gets worse when you're horizontal, stick some pillows behind you to prop up your upper body. But stay down.

Force fluids.

Dehydration is a common side effect of many illnesses. Clean, potable water is the cheapest and best drink of all when you're sick, but you can also switch it up with apple juice, warm broth, ginger or peppermint tea, or the magical stuff known to mankind as chicken soup. (We keep a can of Campbell's Chicken and Stars soup in our pantry on the off chance someone in our household gets sick. The stars have magical healing properties! Ask my husband!) Just keep ladling it in. Yep, that means you're gonna need to pee a lot. It's all part of the process of flushing out the system.

By the way, yes, I know some alcoholic beverages are technically clear fluids, but they're NOT your friend when you're sick. Alcohol might help you sleep, but it also causes severe dehydration, which is the precise opposite of what you want. And that brings us to the next topic:

YOU AREN'T "SICK" IF YOU HAVE A HANGOVER.

Yeah, I know you probably feel like crap, but a hangover isn't an illness -- it's a consequence. You get ill because you were accidentally exposed to a virus or bacterium. There's nothing accidental about you being exposed to a fifth of Chivas Regal. And your boss probably didn't get where she is by being stupid. If she notices you're constantly calling in "sick" on Monday morning or the day after a long weekend, it won't take very long for her to see a pattern -- and for you to get canned. And frankly, you'll deserve what you get. Play it safe and don't drink the night before you go in to work. Doi.

While hangovers aren't an illness, alcoholism is. Think you might have a drinking problem? Adults aren't afraid to ask for help when they need it. Go get 'em, Tiger. Your loved ones (and your liver) will thank you.

Extra credit: get vaccinated.

If you're sick because of a highly-transmissible illness for which a vaccine exists, don't do the dumb again. Assuming you're not immunocompromised, make sure you're vaccinated against these diseases on whatever schedule your doctor or pharmacist recommends. You'll greatly reduce the chance of getting super sick or even dying from something you didn't have to suffer with in the first place. That's not just smart and healthy, it's frugal as well. Bonus!

Thursday, June 13, 2013

How to iron a shirt

There are several ways to handle a good dress shirt, but if you want to look really sharp and professional, you're going to have to learn how to iron that sucker. I could go through the steps one by one here, but a) I've got more important stuff to do today and b) it's really one of those things that's easier to learn by visual example. So I'm turning it over to a video how-to expert.

Here's one after my own heart:


Or if that isn't your style, you can just scan YouTube for your favorite tutorial instead.

A couple of random observations to aid you in your task:
  • Make sure the sole plate of your iron (the hot part that touches the shirt) is clean before you heat it up. If there's any gunk stuck to it, it will probably end up on your shirt.
  • Don't overheat the iron in the hope that it will make ironing faster. You could end up burning or melting your shirt this way, which just makes you look incompetent.
  • For fine fabrics, get a press cloth of woven 100% cotton and put it between the shirt and the iron as you press it. This takes a little while longer, but it keeps the shirt looking nice.
  • Don't iron over buttons. Many are made of plastic. Plastic + hot iron = dead button. Iron carefully around them instead, or grab a stainless steel teaspoon and put the bowl of the spoon upside down over the button as a heat shield while you iron around it.
  • Use your ironing time as a chance to check the shirt for any damage. If there's a stain, spot-treat it and wash it again. If a button is coming loose, sew it back on.
  • UNPLUG YOUR IRON WHEN YOU'RE DONE. I have a terrible habit of leaving the iron on, and when the time came to replace our old iron I ended up getting one that automatically shuts itself off after a few minutes of inactivity. Lifesaver, I tell you.

Monday, June 10, 2013

How to replace a toilet paper roll

Based on the plethora of anguished cries from spouses and significant others all over the planet, I've deduced that knowing how to replace a toilet paper roll properly is a) a sure sign of adulthood and b) in danger of becoming arcane wisdom. Let's try to rectify that today, shall we?

Steady, folks. I know this one is gonna be a toughie. The good news is that once you've gotten the basics down, you can change toilet paper rolls in residential bathrooms all over North America (unless they've gotten their TP dispensers from IKEA or something. Curse you, IKEA, you and your wily weird Scandinavian TP dispensers!). Never again need you flail about helplessly in the restroom, waiting for someone -- anyone -- to come and restore the TP to full working order, for YOU SHALL HAVE SKILLS.

You will need:
  1. a spring-loaded type toilet paper dispenser with an empty toilet paper roll on it
  2. a new roll of toilet paper
  3. minimal manual dexterity
  4. about 30 seconds of your time
Relax. Take a few deep breaths. Remind yourself that others have done successfully what you're about to accomplish. If it helps you achieve a Zen-like state, be seated on the throne in lotus position and meditate upon the paradox of soft-yet-strong quilted paper.

When you're ready...

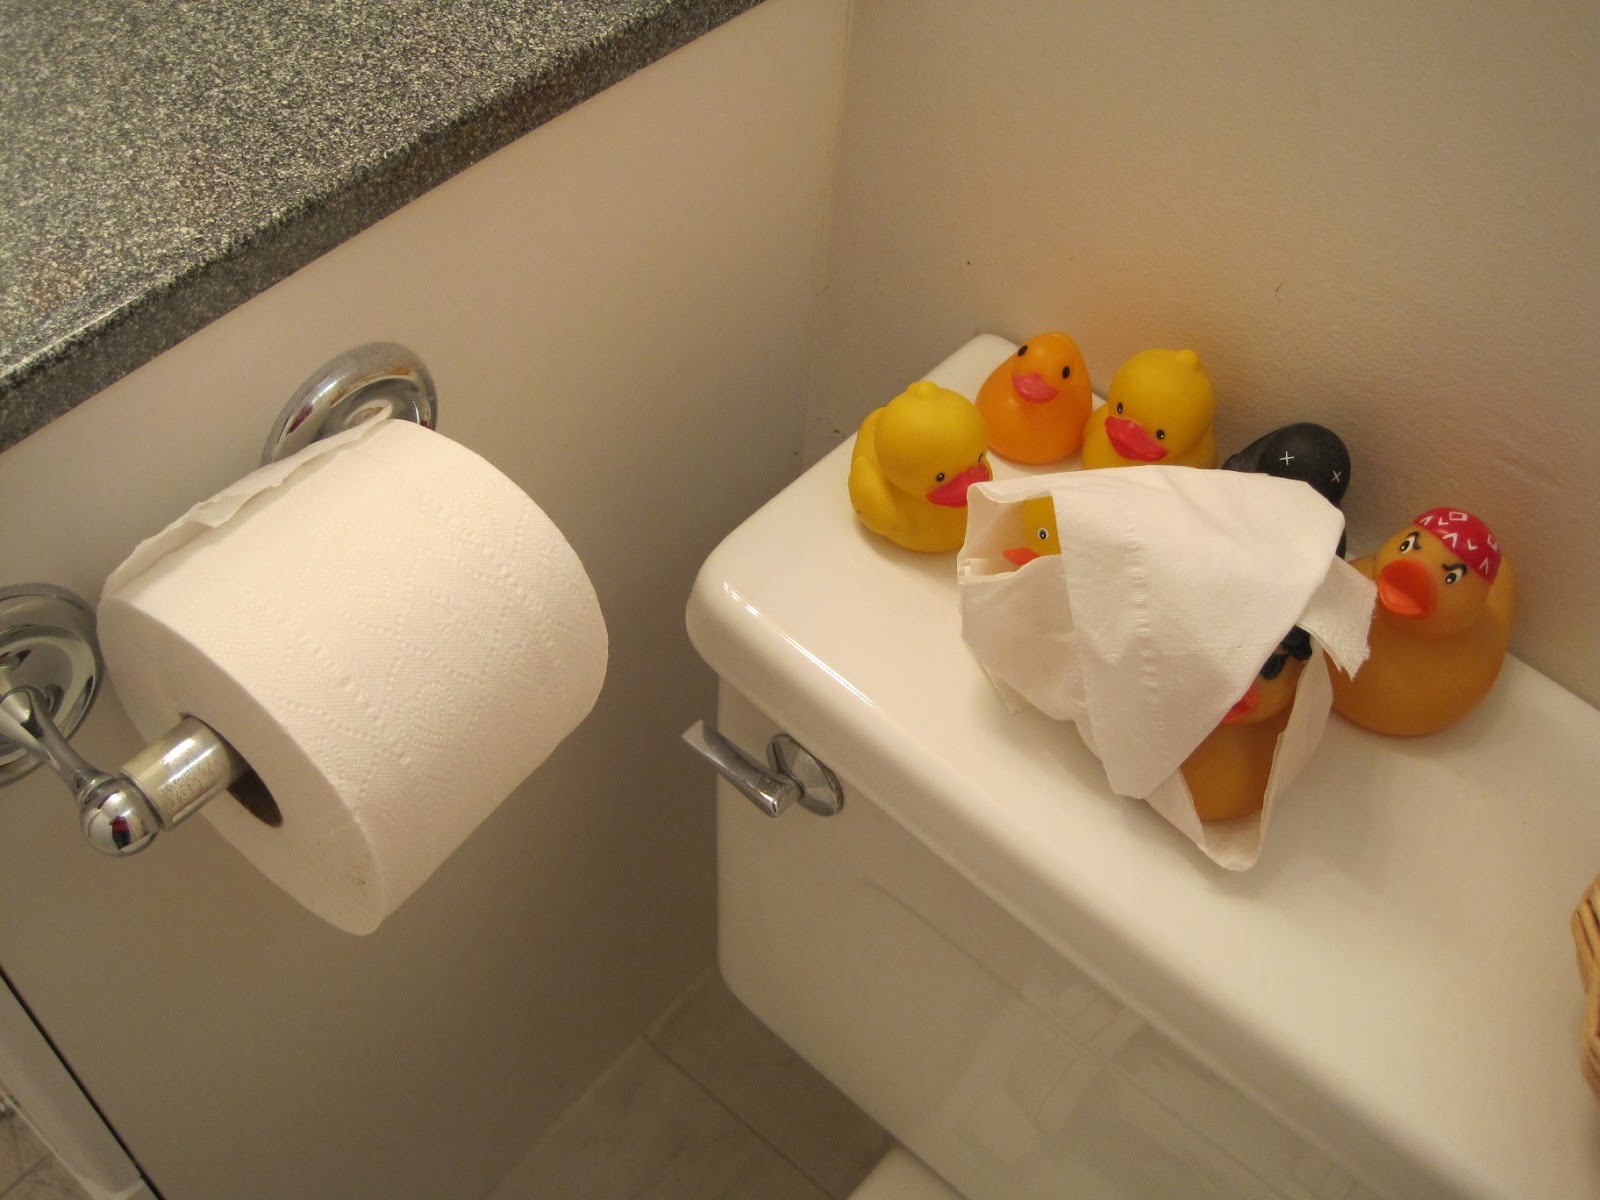
...turn to the task at hand. (Please ignore the ducks. They've invaded our bathroom and nothing we can do will dissuade them from hanging out atop the toilet tank.)

The bar across the center of this TP dispenser is spring-loaded. With boldness, grasp one end of the bar (it doesn't really matter which one -- just pick a side)...

...push firmly toward the other end, and guide the bar down and out of the brackets.

Assuming the spring-loaded bar didn't make a break for freedom and leap toward the floor, you now have a bar with an empty TP roll on it.

As the ducks look on in wonder, grab the empty roll and slide it off the bar. Houston, we have separation.

Once the empty roll is off, feel free to recycle it, craft it into some treasure of trash, or just fling it in the bin with utter insouciance. (Live for the moment, I say!)

Now pick up your trusty new roll of toilet paper...

... and slide the bar right through the handy-dandy hole in the middle.

The never-ending jihad known as Over or Under will not be discussed here. You figure out what works for your household and leave me out of it, OK?

Now you're going to perform a reverse version of the maneuver you used to get the bar off: fit one side of the bar into one bracket...

... press the bar in until it compresses a little...

... and guide the other end of the bar into the other bracket.

Mission accomplished! You now have a working roll of toilet paper, ready to go.

What you choose to do with it next is up to you.

Tuesday, May 28, 2013

How to help a grieving friend

Snark-lovers, be forewarned: for obvious reasons, this one isn't going to be funny.

All right, you're young and strong and even if you don't admit it, you may secretly believe you're invincible. But all that changes abruptly when someone close to you dies. Someone you saw all the time, someone you cared about, someone whose presence you probably took for granted is gone, and you will never see that person again in your life. Not only do you miss that person terribly, but you realize that if he or she died, then so can you. Suddenly your own mortality becomes very real. This may be the reason why so many people try to avoid someone who's grieving -- they're trying to evade the unsettling reminder that someday they, too, will die.

In the West our attitudes toward aging and death have grown increasingly unhealthy; we try to hide from death, box it up, pretend it doesn't exist. But death is a part of life. It can't be evaded, and frankly it shouldn't be. Yes, going through grief is indescribably painful. Yes, it's frightening to contemplate your own death and what may or may not lie beyond it. But it's healthier to face up to the pain and fear, to let yourself feel them, to walk through them, to accept them for what they are, and eventually to come out the other side. As with many other bogeymen, death can only hurt you with the tools you choose to give it.

With this in mind, what's the adult way to help a friend who is going through the aftereffects of a loved one's death? Well, everyone handles grief a little differently, so you'll need to adapt this list to individual circumstances, but these are a set of general guidelines.
  1. Listen. When someone dies, quite often a survivor wants to talk about it -- about shared memories of the deceased, about the circumstances surrounding the person's death, about what it's like to go through grief. Many people are uncomfortable hearing these things and will therefore avoid talking to the survivor, but providing a sympathetic, listening ear is one of the most compassionate things you can do for a grieving person. You shouldn't push the survivor to talk, but be comfortably open to conversation about the dead person -- don't shy away from mentioning him or her by name, or talking about things he or she liked to do.
  2. Be prepared for unpredictable emotional responses. Grieving people can be laughing one moment and crying the next; they can be numb or stoic for days at a time and then suddenly begin raging against the unfairness of a cruel world. Remember that these sudden storms of emotion are not to be taken too personally. Life after a loved one's death is like navigating an emotional minefield. You may think you're moving along just fine, and then a passing thought, a word or phrase, a particular scent or visual will trigger a memory that devastates you all over again. Expect these responses. Although they may seem unreasonable, they are a normal part of grief, and over time they will decrease in frequency and intensity.
  3. Bring food. Grief is a physical phenomenon as well as an emotional one. Survivors often feel dizzy, disoriented, physically cold and shaky, especially in the first few days after a death. They often remember events out of sequence, and may have trouble sleeping or eating. If you ask them whether they're hungry, they will often say "no" even if they really need to eat. So don't ask. Bring over something easy to digest, such as soup, ice cream, smoothies or gelatin, and hand them a serving. No need to force it on them; they will probably take a spoonful or a sip just to be polite, and often that's enough to stimulate the hunger response. A week or two later, if you wish, you may inquire about bringing over a more substantial meal -- comfort food is a good choice.
  4. Decide what you can do to help out. Survivors are often physically and mentally exhausted after a death, and have a difficult time making even simple decisions. Asking some variation of "Is there anything I can do?" isn't useful, as the survivor is usually unable to focus on the question and formulate an answer. Instead, make a short list of things you're willing to do, go to the survivor and present it like this: "I can drive you places, I can pick up groceries, I can take care of your bills, or I can watch your children. Which one would be most helpful right now?" When it comes to answering questions, multiple choice is always easier than essay. Then once the survivor has made a choice from your list, follow it up by doing what you offered to do. (This shouldn't have to be said, but I'm saying it anyway.)
  5. When possible and appropriate, offer financial help. This is sensitive territory, and it must be handled sensitively. In cases where the deceased was the primary breadwinner and there were no contingency plans in place such as a will or insurance, the survivor(s) can fall into financial trouble very quickly. But often a survivor is not comfortable asking others for money, due to a desire for self-sufficiency or simply an all-consuming exhaustion. You needn't wait for someone to ask, though. You can send money anonymously if you have the means, or take up a collection for the survivor(s) through a crowdfunding site. But before you do so, please take into account the feelings, needs and desires of the survivor. And don't use money as a substitute for engaging.
  6. Please, please, please, think before you speak. Sometimes people are so keen to have something to say to the bereaved that they put their feet in their mouths. Don't tell the survivor how hard this is for you -- share that sentiment with a friend further distanced from the tragedy. And even if you believe it, DO NOT tell survivors that the death was God's will, or that God must have needed the dead person. It's not comforting, and can actually create long-lasting psychological pain. My sister still has not made her peace with a God who she believes took her father away, because when she was a small child some well-meaning idiot suggested to her that God needed her daddy in heaven more than his wife and six small children needed him on earth. It's better to keep your comments simple. "I'm so sorry for your loss" and a gentle hug, if appropriate, are sufficient.
  7. Help the survivor find something to look forward to. One of the things my mother has often said about my dad's death is that, concurrently with her grief over his passing, she grieved over the death of so many of their shared goals and dreams -- the things they planned to do together. Many survivors, especially in the first few months after a loved one's death, have a tough time finding reasons to keep living. You can't just drag them here and there, but if you find activities you think they might enjoy, tell them. Sign up for adventures and invite them to come with you. Have them accompany you to a new restaurant for lunch. Your job is not to set the survivor up with anybody -- frankly, that's nobody's business -- but to provide opportunities once in a while for the survivor to develop new interests in the next chapter of his or her life.
  8. Be patient. Grief isn't like getting the 24-hour flu. It takes time; how much time varies from person to person. You can't expect a survivor to bounce back right after the funeral, or in two weeks, or even in six months. Grief is a journey taken on foot through an unknown wilderness. You can provide oases of rest and support now and then, but you can't hurry people through the process; trying to push them to be done with it only delays the journey. Try to show the kind of grace, patience and love you would want others to show you if you were taking that same journey, and have faith that your friend will eventually reach a point where his or her life begins to get better.
If you truly seek to be something more than a fair-weather friend, you should do what you can to support your friends in hard times. It will be difficult and emotionally wrenching to do so. But true adults are brave enough to undergo potential pain for the sake of the people they love and care about, and in so doing, will grow stronger from helping to lift and lighten another person's burden of grief.

Monday, May 20, 2013

How to shop for groceries

I'll bet you think you already know how to shop for groceries.

Hmm.

OK, picture this: you enter the grocery store just after a long day at work or school, dying of hunger, and immediately have to cut your way through the starving barbarian hordes of workers and students who are doing exactly the same thing. Your impulsive monkey brain prompts you to grab lots of ready-to-eat food from the deli and bakery sections of the store. Then you run up and down the aisles, cavalierly tossing anything that looks good into your cart. Dead-ending in the produce section, you throw in some guilt-purchased bagged lettuce and a few other fruits and veggies that you have every intention of making into... something, eventually. You wait 20 minutes in line to pay an insane price for this cart fulla goodness, as all your frozen foods defrost. On the way home, since by now you're so hungry you're in danger of gnawing off your own arm for sustenance, you pick up some fast food for dinner. Three weeks later you have to hose out your fridge's crisper bin because it's full of rotting goop that was once the vegetables you bought.

This scenario happens to everyone once in a while, but if it describes most of your shopping trips? Yeeeeeaaaaah, you don't really know what you're doing. It's time you got schooled!

You will need:
  1. The most recent advertising circular from your grocery store of choice.
  2. Some time to figure out a plan of attack.
  3. Grocery money from your spending plan.
  4. A cookbook or a set of recipes you want to try.
  5. A piece of paper and a pen or pencil.
  6. A calculator (optional).
  7. Transportation to and from the grocery store.
Here's whatcha do.

Strategic planning


Strategic grocery shoppers can successfully manage three factors: how much money they have to spend, what's on sale, and what they want to cook.

Figure out first how much cash you have to work with; pull the amount from your spending plan and keep it in front of you as you work out your grocery list.

Now browse the ad circular. It will list all the items on sale this week. If you see a sale item you know you'll need (toilet paper, soap, toothpaste, etc.), write it down. It's also a good idea to write down the brand name and advertised price so you remember what's on sale when you're at the store. If the circular has any printed coupons for things you use, cut them out and take them with you. (Don't be too proud to use coupons! They'll save you money, and the store expects people to use them.)

Finally, look over the recipes you want to try. See any ingredients from the recipes that are on sale this week? It's a little like playing that old memory game where you try to find two matching images on the cards. Focus heavily on the recipes with items that are on sale, and write down what you'll need to make each recipe. Your grocery list is taking shape. As you go, make a rough estimate of the running total (you may need to use a calculator), so that you don't end up spending more money than you have.

Hungry? Eat a small, high-protein snack (examples: lunchmeat, fried egg, beef jerky, cheese stick, peanut butter) before you go shopping. Protein satisfies your hunger without making you feel stuffed, and when you go grocery shopping you want to aim for a happy medium -- not too hungry, not too full. (If you are too full, everything food-related will look nauseating, especially under those soul-sucking fluorescent lights. Wait an hour or two before you go shopping.)

Now gather up your money, grocery list and coupons and, to paraphrase a line from Predator, "Get to da shop-pah!"

In the store


If you can swing it, shop at a time of day when the store isn't packed fulla customers. I know circumstances don't always make this possible, but when the store is less hectic, you'll feel a lot less stressed and you'll make better choices. (Since I'm a night owl by nature and my local grocery is open 24 hours, I've become the master of the Epic Late-Night Grocery Run. Late-night shopping means there's food in the house first thing in the morning, and it also makes redeeming a whole stack of coupons less vexing to others, since I rarely have to worry about anyone waiting behind me in line.)

Plan a path through the grocery store. Start in the produce section, move to the canned foods, pantry and nonperishable items, non-foods (things like soap and TP), then baked goods, eggs and dairy, meat and seafood, and finish with the frozen items. If you buy the perishable and frozen items last, just before you hit checkout, they'll be in much better shape by the time you get home.

Don't just merrily fling stuff into your cart; pay attention to what you're buying. Check expiration dates on dairy products and canned goods, open and inspect cartons of eggs to make sure none are cracked or smashed, make sure produce isn't bruised or moldy, check the labels to find out what you're eating, and don't grab the first shopworn container off the shelf. You may as well get the most value for your money.

Buy head lettuce rather than bagged lettuce. It doesn't take that much extra time to prepare, and head lettuce is usually cheaper and lasts a lot longer than the stuff in the bag. And if you never buy anything but iceberg lettuce, try branching out a little and picking up some red leaf, Romaine, butter lettuce, arugula or spinach, depending on what's on sale.

Pick up fruits and vegetables when they're in season, and plan your recipes around them. They'll be cheaper and taste better. If you have no notion of what's in season, do a web search for "in-season produce" for your area -- or just let your nose be your guide; really fresh fruit tends to smell wonderful. And don't be scared of whole fruits and vegetables. They don't take much time to clean and prepare, and they cost less if you do the prep work yourself.

If something you need isn't on sale, look for a store brand. Many large grocery chains offer house-brand items that are as good as or better than the nationally-advertised brands, and they're almost always less expensive. Sometimes they're even less expensive than the advertised sale item. (If you're not sure you'll like the store brand, get the smallest available size of the item and sample it at home; if you hate it, most stores will let you return the unused portion for a refund.)

Check the Used Food Section for bargains. (No, I don't know of any stores that actually call their markdown areas "Used Food," but I'd love it if someone did.)  Meat, dairy and produce are usually marked down because they're close to expiring, so if you find a good deal here be prepared to use or freeze it ASAP. Marked-down bakery items are usually in danger of going stale (meh), but shouldn't actually be moldy (ew). Marked-down cans are usually dented; examine them very carefully to be sure there are no leaks, swelling or other signs that the contents have turned evil. Botulism poisoning is never a bargain.

Don't buy anything on display in the checkout line. Seriously. Pure impulse buys. STAY STRONG, LITTLE SHOPPER.

Don't forget your coupons -- and don't let your checker forget them. (I usually say, "By the way, I have some coupons" as the checker starts scanning my items, and I put them up on the check-writing platform so they're clearly visible. Then the checker scans my coupons and I smile delightedly as my grocery total starts to shrink.)

At home


Once you bring the bags in, put the frozen stuff away first, then the perishables, then the canned goods and pantry items, and finally the non-foods.

Plan out your meals so that the most perishable food gets used up first. If you bought fresh fish, you should eat it by the next day. Eat fresh poultry within 48 hours. Ground meat goes bad faster than steaks, chops and roasts. And have a specific purpose in mind for your fruits and vegetables. Cook and eat them promptly so they don't have time to evolve into a new lifeform and crawl out of the fridge on their own. Yeeze.

Grocery Fu: for advanced shoppers only


Mastered all of the above, and ready to level up? OK, here we go.

Buy staple pantry items and non-perishable items in bulk whenever they go on sale. To do this effectively, you need a good feel for what items are "staple pantry items" around your place. Staples are the long-storing foods you use most often to cook or bake, and they vary from household to household depending on your cooking style and dietary needs. (Your kitchen canisters may be labeled Flour, Sugar, Coffee and Tea, but you probably won't use them for those items if you're a celiac, a diabetic and a Mormon, right?) If you don't know what your staple items are, look over the recipes you cook most often. Seeing certain familiar ingredients again and again? Behold your staples!

If you have a freezer, you can stock up on some perishable items that freeze well. Roasts and chops freeze well if they're wrapped properly. So does butter (let it defrost in the fridge before using it). Milk? Ehh, notsamuch. If you plan to do a lot of freezing, check out this list of foods that freeze well (and some foods that don't).

Shop around. Many grocery stores have frequent buyer programs where they'll give you discounts on groceries and/or gasoline if you shop there more often, but it's easy to fall into the rut of buying all your food in the same place... don't do that! Remember, it's OK to cheat on your grocery store! Check to see what the competition is doing every now and then, and see what they're offering that your usual grocery store doesn't. This goes double for specialty stores like Trader Joe's or your friendly neighborhood spice emporium. They won't have the wide range of products your local supermarket has, but they do offer amazing stuff at (usually) low prices. And don't forget your local farmers' markets, where you can find super-fresh local produce and the kind of unusual fruits and veggies that most big commercial farms don't bother to grow.

Peg Bracken, of The I Hate To Cook Book fame, used to suggest bringing a small cookbook to the grocery store; then if you come across a snazzy unadvertised sale on something, you can look it up in the book's index, find a good recipe for it, and save yourself another trip by picking up the needed recipe ingredients. Of course, Ms. Bracken wrote this in the early 1960s, when Al Gore was still busy inventing the Internet. Why lug around a cookbook if you already have a smartphone? The power of the Net in the palm of your hand!

Have any additional advice to share about honing your grocery shopping skills? Drop me a line!